how to make coffee creamer
This quick guide shows exactly what you need to craft a simple, store-bought alternative at home. In just 2–5 minutes a shake-in-a-jar method yields a pourable mix that softens bitterness and adds flavor to a morning cup.
The core idea is a dependable base formula: dairy or non-dairy plus sweetener and flavor. From that base you can turn it into vanilla, French vanilla, mocha, pumpkin spice, or dairy-free versions without special equipment.
We define a homemade coffee creamer recipe as a pourable blend used to smooth and flavor your brew. This section previews two main methods: a no-cook mason jar method for speed and a stovetop method for infused flavors and extra-smooth texture.
Readers will learn simple ingredient swaps, how to adjust sweetness and thickness, suggested pours per cup, and safe storage for a week. All measurements use U.S. kitchen norms and include tips for scaling up or down based on how often you brew at home.
Why Homemade Coffee Creamer Beats Store-Bought
Homemade versions give clean, simple blends that beat shelf options on transparency and taste. Many commercial products labeled as nondairy are mostly water, vegetable oils, emulsifiers, and artificial flavoring rather than real milk or cream.
Cleaner ingredients and no mystery additives
When you blend at home, you skip preservatives, hydrogenated oils, and odd stabilizers. Use plain milk, half-and-half, or a full-fat plant milk and list every ingredient on the jar.
Control sweetness and creaminess per cup
Adjust sweetness with a little sugar, maple syrup, or honey. Swap heavier dairy for more fat when you want a cafe-style pour. That control means a lighter cup on weekdays and a richer one on weekends.
Easy seasonal and pantry-friendly swaps
Vanilla, cinnamon, cocoa, and extracts let you customize flavor without buying many bottles. This saves money if you already keep milk or half-and-half on hand.
- Skip vegetable oils and artificial flavors
- Understand nondairy labels and hidden milk proteins
- Choose sweetness and fat level yourself
Next, we’ll list the three core building blocks you need: a creamy base, a sweetener, and a flavor enhancer.
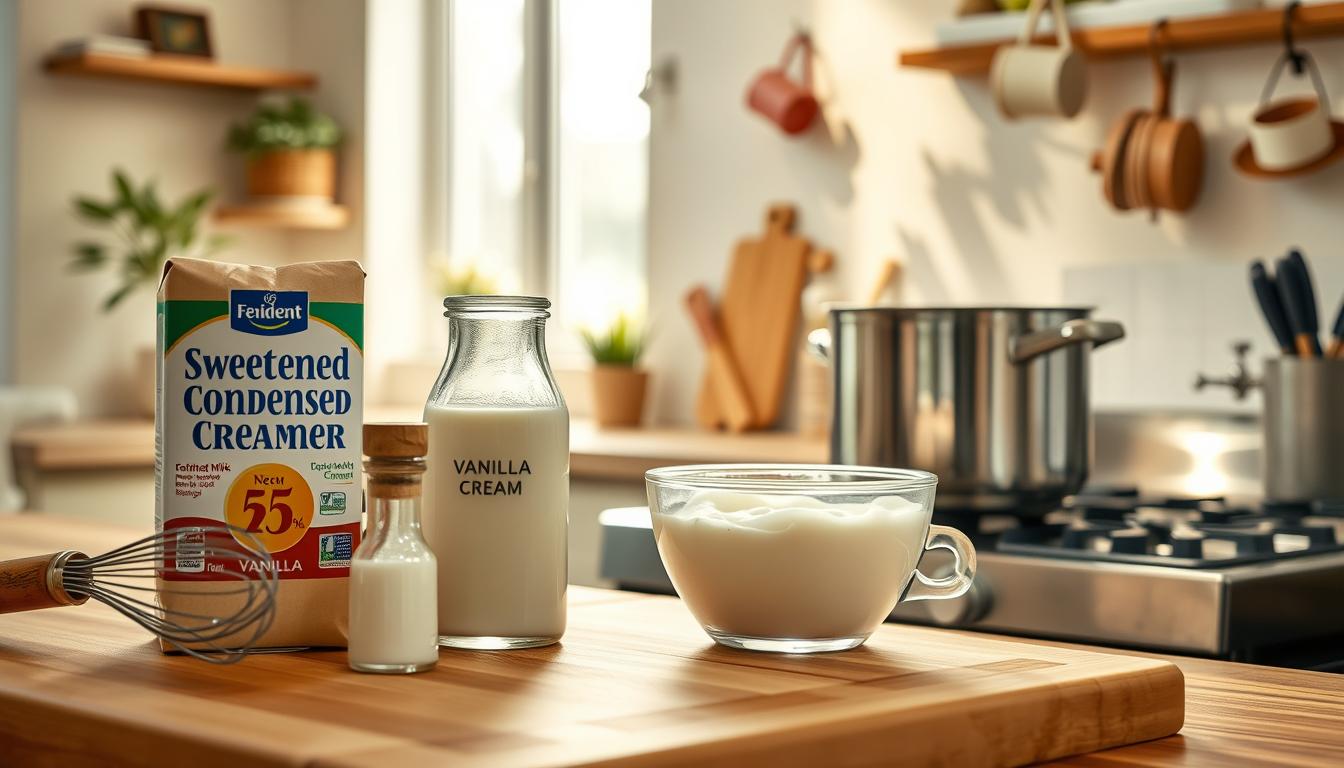
Ingredients You Need for a Classic Coffee Creamer Recipe
A few simple ingredients deliver a balanced, creamy pour that brightens your morning brew.
Classic three-ingredient base: half-and-half for body, sweetened condensed milk for creamy sweetness, and vanilla extract for a familiar café-style finish. This trio gives smooth texture, built-in sugar, and that warm vanilla note.
- Half-and-half basics: Use store-bought half-and-half or combine equal parts milk and heavy cream. Adjust the ratio for lighter or richer pours.
- Sweetened condensed milk: It sweetens and thickens at once, creating a dessert-like finish without extra sugar. For a lighter cup, start with less condensed milk and taste with real coffee before adding more.
- Vanilla extract: Add a small amount, taste, then stop. Too much vanilla extract can give a boozy aftertaste.
Alternatives: swap some condensed milk for maple syrup, brown sugar, or honey. Maple adds cozy depth, brown sugar brings caramel notes, and honey reads floral. Mix cold for speed or warm gently for infused flavors; methods and tools come next.
Kitchen Tools and Prep Tips for Quick Homemade Coffee

A few simple tools make homemade coffee blends fast and repeatable. Use what you already own and plan one tidy workflow that measures, mixes, and stores in one go.
Mason jar: the fastest shake-and-go method
A clean quart (32 oz) mason jar lets you measure, mix, taste, and store with minimal cleanup. Add ingredients, seal the lid, and shake until smooth.
Shaking disperses condensed milk through the dairy base. That creates a pourable creamer in minutes without heat.
Pitcher, bowl, and whisk for larger batches
For quart-plus batches, whisk in a bowl so the mixture fully blends. Then funnel into a pitcher or bottle for easy pouring and labeling.
| Tool | Best use | Storage note |
|---|---|---|
| Quart mason jar | Measure, mix, store | Label with date; store refrigerator shelf |
| Bowl + whisk | Large batches and smooth blends | Transfer to pitcher; chill before tasting |
| Pitcher or bottle | Easy pour for morning cup | Keep upright in fridge door or shelf |
Quick checklist: label the jar, keep a tasting spoon nearby, and chill before final tasting because cold affects sweetness. Test one small amount in a single cup before scaling up.
How to Make Coffee Creamer in Minutes (No-Cook Mason Jar Method)
Use a clean quart jar and three pantry staples for a reliable, no-heat creamer in minutes. This no-cook method gives a smooth, ready-to-pour blend with very little fuss.
Equal-parts mixing formula for consistent results
Memorize this: equal parts half-and-half and sweetened condensed milk. Add a splash of vanilla extract and you have a dependable base every time.
Step-by-step: combine, shake, taste, and adjust sweetness
- Add half-and-half and sweetened condensed milk to the jar (equal volumes).
- Pour in 1/2 teaspoon vanilla extract for each cup of base, seal lid, and shake vigorously until smooth.
- Taste a small spoonful, then test an amount in a cup of your usual brew and tweak sweetness in small increments.
Adjusting thickness and portion guidance
Want it lighter? Add more half or plain milk a tablespoon at a time. For a richer pour, stir in a splash of heavy cream.
Start with about 1 tablespoon per cup of coffee. Add more only after tasting so the flavor enhances, not masks, the brew.
Separation fix and final tips
Small separation is normal since there are no stabilizers. A quick shake before each pour solves it.
For more ideas and a full recipe, see this trusted homemade coffee creamer.
| Issue | Quick fix | Notes |
|---|---|---|
| Too sweet | Add milk or half-and-half | Adjust one tablespoon at a time |
| Too thin | Stir in heavy cream | Use small splashes to avoid cloying texture |
| Separation | Shake before pouring | Normal for homemade blends |
Stovetop Method for Infused Flavors and Extra-Smooth Creamers
For barista-style infusion, a brief stovetop step smooths textures and intensifies aromas. Heat works best when you want spices and cocoa to dissolve fully or when using a vanilla bean for deeper flavor.
When gentle heat helps
Warming the milk and sweetened condensed milk dissolves powders and rounds out spice notes. This method makes spice coffee and mocha profiles taste more blended and less sharp.
Vanilla bean steeping
Split a vanilla bean, scrape the seeds into the pan, and add the pod. Heat the milk and sweetened condensed milk mixture over medium until warm, not boiling, for 5–7 minutes.
Cover and let the mixture steep about 15 minutes. Remove the pod, then cool completely for best homemade vanilla or french vanilla results.
Cooling and storage tips
Cool to room temperature, then refrigerate until fully chilled. Cold creamer stays smooth and resists graininess when added to iced coffee.
Avoid overheating — high heat can scald milk and ruin the pourable texture. This is the batch-and-chill route for people who want café-style infusions at home.
| Step | Why it matters | Timing |
|---|---|---|
| Warm base gently | Dissolves powders and melds flavors | 5–7 minutes until heated through |
| Steep vanilla bean | Infuses rich, natural vanilla notes | Cover and steep ~15 minutes, discard pod |
| Cool then chill | Prevents graininess in iced drinks | Cool to room temp, refrigerate fully |
Flavor Variations to Make Homemade Coffee Creamers You’ll Crave

A simple flavor lane—vanilla, maple, spice, or mocha—keeps recipes easy and repeatable. Start with your standard base and add one primary note, then taste and adjust in tiny steps.
Vanilla choices
Use a whole vanilla bean for warm, layered vanilla coffee creamer. Scrape seeds into the base and steep for a natural depth.
Vanilla bean powder delivers a French vanilla-style finish without extra liquid. It’s great when you want a fuller aroma but less extract.
French vanilla restraint
When using vanilla extract, add little by little. Taste in a cup so the blend remains creamy, not sharp or boozy.
Maple and pumpkin spice ideas
Maple syrup plus a touch of vanilla yields a cozy maple vanilla profile that pairs well with roasted beans.
For pumpkin pie spice creamer, steep a cinnamon stick gently in warm base for a few minutes. Heat helps spices meld without tasting dusty.
Mocha and extract swaps
For mocha creamer, cocoa powder needs whisking or gentle heat to dissolve. Chocolate syrup blends instantly and tastes indulgent.
Swap extracts—hazelnut, almond, peppermint—for quick changes. Start with small drops; extracts intensify after chilling.
- Choose one main flavor lane.
- Add small adjustments and test in a cup.
- Write down ratios so you can repeat favorites each morning.
| Flavor | Main ingredient | Method tip |
|---|---|---|
| Vanilla bean | Vanilla bean or powder | Steep seeds for depth; powder for French vanilla note |
| Maple vanilla | Maple syrup + vanilla | Add syrup slowly; pairs with medium-dark roast |
| Pumpkin spice | Ground spice or cinnamon stick | Warm briefly to integrate spices, then cool |
| Mocha | Cocoa powder or chocolate syrup | Heat for powder; syrup mixes cold for dessert-like taste |
| Extract swaps | Hazelnut, almond, peppermint | Use sparingly; flavor sharpens after chilling |
Dairy-Free and Lighter Options (Without Losing Creamy Texture)
Swap dairy without losing lush mouthfeel by choosing fuller-bodied plant milks. Oat milk and full-fat coconut milk give a thick, silky base. Almond milk works when blended with a richer note like coconut for body.
For a dairy-free base, replace half-and-half with your preferred non-dairy milk. Use coconut sweetened condensed milk where available. If not, add about 1 tablespoon of syrup or sugar per cup of base and taste.
Practical swap options
- Oat milk: high body, resists separation in hot coffee.
- Full-fat coconut: adds fat and cream-like texture.
- Almond milk: lighter; pair with a thicker syrup or a splash of full-fat coconut for richness.
Condensed milk and lighter dairy tweaks
Condensed milk adds sweetness and thickness. If you skip condensed milk, choose a thicker non-dairy base or increase sweetener slightly.
| Goal | Best pick | Note |
|---|---|---|
| Thick, dairy-free base | Barista oat or full-fat coconut | Less separation; richer mouthfeel |
| Lighter option | Milk or half-and-half | Lower fat; still creamy in hot coffee |
| Sweetness swap | Maple syrup or sugar | About 1 tbsp per cup base; adjust |
Tip: if separation occurs, shake before pouring or try barista-style oat milk. Measure portions so lighter swaps fit daily habits. These options help you make homemade choices without returning to store-bought mixes.
Store, Shake, and Sip: Keeping Your Creamer Fresh All Week
A simple storage routine keeps flavor bright and prevents spoilage of homemade blends. Store the batch covered in an airtight container and place it on the back, bottom shelf of the refrigerator where temperatures stay most stable.
Refrigerator placement and containers
Use a mason jar or a glass bottle with a tight stopper for best results. Label the container with the made-on date so you track freshness at a glance.
Shelf life and a sensible use-by rule
Plan on up to two weeks of life, or the earliest sell-by date on the milk or half-and-half you used. Follow whichever date comes first as your practical cutoff.
Why freezing isn’t recommended
Freezing dairy mixtures often changes texture. Thawed batches can separate or turn grainy and won’t blend smoothly into hot or iced coffee.
Serving tips and daily routine
Shake or stir before every pour since homemade blends lack commercial emulsifiers. For iced drinks, whisk briefly so the creamer disperses evenly.
- Discard if it smells sour, looks oddly chunky, or tastes off.
- Keep a tablespoon measure near your brew station for a consistent morning amount.
- Shake the jar for about 5–10 seconds before pouring into a cup.
| Task | Best practice | Why it matters |
|---|---|---|
| Placement | Back, bottom shelf of refrigerator | Most stable cold temperature; avoids door swings |
| Storage time | Up to 2 weeks or dairy sell-by | Prevents spoilage and off-flavors |
| Freeze? | No — avoid freezing | Preserves texture and blendability |
Your New Morning Ritual: Make Homemade Coffee Creamer Your Way
A few measured steps and a quick shake are all it takes to build a steady at-home creamer habit. Choose a base—dairy or dairy-free—set sweetness, add a single flavor, then chill and label.
Rely on the equal-parts rule and a taste-and-adjust mindset. Once you try this method, it becomes muscle memory and saves time each morning.
Rotate seasonal notes: maple in fall, mocha for dessert, light vanilla for everyday. Measure the amount you add per cup so your coffee flavor stays center stage.
Track favorite ratios and assemble a small at-home bar. Make a batch today, chill it, and test it in both hot and iced cups so you know the results.