how to clean ninja coffee maker
Brews that taste sour or bitter often come from buildup inside the unit, not the beans. Regular maintenance keeps flavor bright and extends the life of your appliance.
In this short guide you will learn safe, fast, and thorough cleaning steps. I’ll cover quick daily washups and full descaling cycles. Expect most tasks to take only minutes. A full clean cycle can run about an hour or longer.
Watch for signs that your machine needs attention: off-tasting coffee, slower flow, a “CLn” indicator, or visible residue. Acting early stops mineral and oil buildup from damaging parts.
Tools are simple: warm water, dish soap, and either a vinegar solution or a commercial descaler. Steps here apply across popular models; model-specific notes come later for Ninja Specialty and DualBrew Pro.
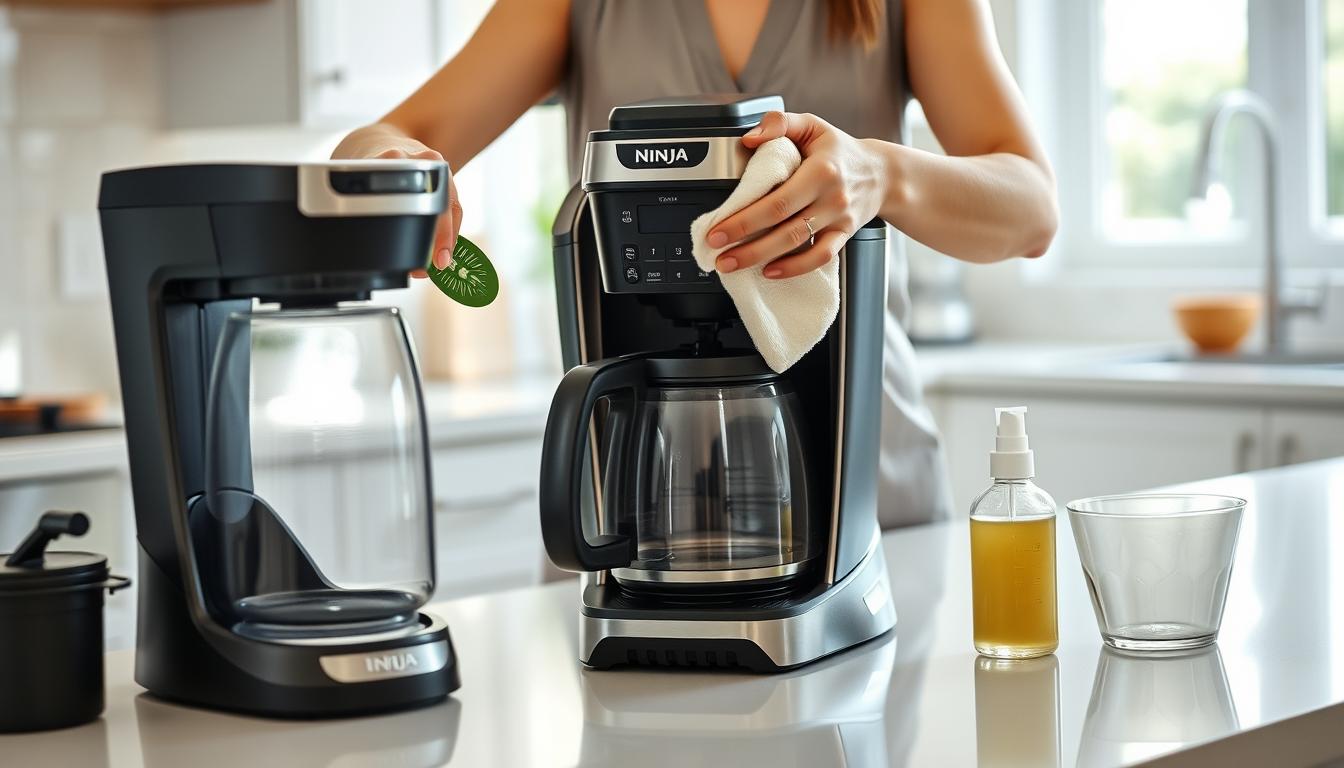
Safety first: always power down and unplug before wiping. Never submerge the base of the unit.
– Learn safe daily and deep cleaning steps.
– Spot warning signs early to protect flavor and parts.
– Most tasks take minutes; descaling takes about an hour.
Why regular cleaning matters for your Ninja coffee maker
Leftover oils and scale inside the unit quietly sap flavor and shorten the machine’s life. Regular cleaning restores bright flavor coffee and keeps extraction consistent. Small tasks prevent bigger repairs and save money over time.
Better flavor, fewer bitter or sour notes
Old coffee oils and residue coat the brew path. That leaves bitter, sour, or stale notes in each cup. A routine rinse and wipe protect the taste and help every batch taste fresh.
Hygiene basics that prevent mold and bacteria
Standing water and condensation in the water reservoir invite mold and bacteria. Emptying and drying the reservoir after use lowers health risks and keeps smells away.
Longer life by reducing mineral deposits and clogs
Mineral deposits and mineral buildup from tap water narrow internal tubes and stress the pump. Descaling protects internal parts and prevents flow issues and clean reminders.
| Problem | Common Cause | Quick Fix | Benefit |
|---|---|---|---|
| Bitter flavor | Old oils in brew path | Rinse brew parts and wash carafe | Better flavor coffee |
| Mold smell | Standing water in reservoir | Empty and dry reservoir after use | Improved hygiene |
| Slow flow / CLn alert | Mineral deposits | Run a descaling cycle | Consistent temp and flow |
What you need before you start the cleaning process
Gathering the right supplies before you start makes the task quick and predictable. Lay out parts on a clear counter and let everything cool completely.
White vinegar water mix vs. a commercial descaling solution
Use a white vinegar water mix for light scale and routine home use. A branded descaling solution suits heavy mineral buildup or when manufacturers recommend a specific product for warranty reasons.
Dish soap, warm water, and a soft cloth sponge
- Dish soap and warm water for daily washing.
- Non-abrasive cloth sponge for wiping parts and seals.
- Soapy water for frother pieces and small crevices.
Carafe, brew basket, pod adapter, and sink-ready setup
Gather the carafe, brew basket, permanent filter, removable filter holder, and pod adapter if applicable. Many carafes, lids, permanent filters, and filter holders are top-rack dishwasher safe.
| Item | Best for | Care |
|---|---|---|
| White vinegar water | Light descaling | Rinse with fresh water after cycle |
| Descaling solution | Heavy scale | Follow label; rinse thoroughly |
| Pod adapter | Dual-brew models | Hand wash only |
Setup checklist: empty the reservoir, clear counter space, and keep a towel ready for drying. The cleaning process runs smoother when parts are cool and within reach.
Everyday cleanup after brewing Ninja coffee
A quick routine after each brew keeps your machine tasting fresh and working well.
Safety first: power down and cool
Always turn the unit off, unplug it, and wait until hot surfaces cool. This prevents burns and keeps water away from live parts.
Empty and rinse the reservoir
Dump leftover water from the reservoir and rinse with clean water. This reduces standing water that can cause odors or mold.
Wash removable parts
Remove the filter, basket, and any pod adapter. Dispose of grounds or pods, then hand wash or place top-rack dishwasher-safe parts on the top rack using warm, soapy water.
Carafe, tray, and exterior care
Wash the carafe and lid right away to prevent oils from sticking. Wipe the drip tray, grill, and exterior with a damp cloth, focusing on splash zones.
Milk frother and final steps
Clean the frother in soapy water, rinse, and dry well so milk residue cannot harden. Only reassemble when every part is fully dry.
| Action | Part | Why it matters |
|---|---|---|
| Rinse reservoir | Water reservoir | Stops standing water and odors |
| Wash parts | Filter & basket | Removes grounds and oils |
| Wipe down | Drip tray & exterior | Prevents stains and sticky spots |
| Dry fully | Carafe & frother | Prevents mold and preserves flavor |
Weekly deep-clean habits that keep mineral buildup away

A weekly deep run targets hidden spots that daily rinses miss, especially in reservoir corners and seams. These short sessions stop small scale patches from growing into flow problems or odd tastes.
Removing and washing the reservoir
Remove the water reservoir and empty any standing water. Wash the reservoir with warm water and mild soap, reaching corners with a soft cloth or sponge.
Rinse thoroughly and dry fully before reinstalling. Keeping the reservoir lid area dry prevents mold and limits mineral deposits around seals.
Cleaning the permanent filter and filter holder
Unclip the permanent filter and the removable filter holder. Gently scrub the fine mesh with a soft brush under running water to clear trapped grounds and oils.
Let both parts air dry completely before putting them back. This weekly habit reduces clogging and keeps steady flow through the coffee maker.
- Pick one day each week for this slightly longer clean.
- Avoid leaving water sitting in the reservoir between uses.
- Dry the lid and fill spout after rinsing to discourage mold.
| Task | Frequency | Benefit |
|---|---|---|
| Wash water reservoir | Weekly | Prevents mold and lowers mineral deposits |
| Scrub permanent filter | Weekly | Removes grounds and keeps steady flow |
| Dry lid and spout | After each wash | Stops standing water and odors |
| Full inspection | Weekly | Find early wear and avoid problem taste |
how to clean ninja coffee maker with a clean cycle and vinegar water
A single focused cleaning cycle can restore flow and reduce off-flavors fast.
Mix the vinegar solution
Pour 2 cups (16 oz) distilled white vinegar into an empty reservoir. Add cold water up to the Max Fill line so the ratio matches most manufacturer recommendations.
Start and let the program run
Use the device’s clean cycle or cleaning cycle setting and begin. Do not interrupt the run cleaning once it starts; stopping early can leave loosened residue inside the system.
Recognize cycle complete and rinse
Cycle complete means the unit stops on its own and indicator lights change or turn off. Immediately run 2–3 full-carafe brew cycles with clean water until the output is clear and the vinegar smell is gone.
Final carafe care and troubleshooting
Wash the empty carafe in warm, soapy water before the next brew to remove residual vinegar aroma. If the machine still prompts for cleaning, rerun the full cleaning cycle and ensure it finishes without cancellation.
Descaling a Ninja Specialty coffee maker

A deep descaling run removes hard mineral buildup that slows flow and dulls flavor.
When to descale and what the indicator means
Descale every three to six months depending on use. If the Clean light appears or the machine slows, act sooner. Descaling removes limescale and residue that form from tap water.
Running a Full Carafe descaling cycle
Select the Full Carafe option and place the carafe under the brew spout. Pour 2 cups (16 oz) white vinegar into the reservoir, then add cold water up to the Max Fill line. Press the Clean button to start the cycle.
The program runs about 60 minutes as the solution flows through internal pathways and loosens scale. Let the machine finish without interruption so the process completes fully.
Post-descale rinses and final steps
After the cycle ends, discard the vinegar solution. Run 2–3 full-carafe cycles with clean water until no vinegar smell remains. This protects flavor and prevents residual taste in your next brew.
Wash the carafe and any removable parts with warm, soapy water and dry thoroughly. Reassemble and reset any indicators so the machine is ready for fresh brews.
- Frequency: every 3–6 months or when the Clean indicator lights.
- Solution: 2 cups white vinegar + water to Max Fill for a Full Carafe run.
- Rinse: 2–3 full cycles with clean water after descaling.
For an extended walkthrough, see this descaling guide for model-specific tips.
Cleaning the Ninja DualBrew Pro Specialty Coffee System
The DualBrew Pro needs extra attention because it switches between pods and grounds, so more parts see coffee and trap residue. A quick daily wipe and a weekly deeper check keep brews tasting right and the machine running smoothly.
Daily care for the pod adapter and basket
After each use, remove the pod adapter and rinse it by hand with warm, soapy water. The pod adapter is not dishwasher-safe; hand wash only.
Wipe the brew basket and surrounding area. Let parts dry before reinserting.
Weekly steps for the hinged hood and removable top lid
Open the hinged hood gently and slide the top lid out. Hand wash, rinse, and dry the lid and the hinge area.
Do not force hinges; reinstall only when fully dry and seated correctly.
Needle care and indicator logic
Wipe needles using a microfiber cloth dampened with warm, soapy water to remove grounds and oils. Dry the needles before use.
The Intelligent Clean Cycle Indicator turns orange as a warning. A mode-specific “CLn” means descaling is recommended for that active mode (Pods, Grounds, or Hot Water).
Descaling, rinse cycles, and reassembly checks
Place the carafe, add the standard vinegar-and-water solution, then press Clean and Start Brew. Let the full ~75-minute cycle finish; it ends with a beep and an “End” message. Run the appropriate rinse by mode: Pods — 12 oz Classic; Grounds — Full Carafe Classic; Hot Water — Full Carafe on Boil.
Rinse and dry parts, confirm lids and handles are seated, and plug in only after the base is dry. Never submerge the base and always unplug before major servicing.
| Area | Action | Frequency | Benefit |
|---|---|---|---|
| Pod adapter | Hand wash with soapy water | After every use | Prevents residue buildup and damage |
| Hinged hood & top lid | Slide out and hand wash; dry fully | Weekly | Prevents mold and ensures smooth operation |
| Needles | Wipe with damp microfiber cloth | Weekly or as needed | Clears blockages; restores flow |
| Descale cycle | Press Clean then Start Brew; rinse per mode | Every 3–6 months or when CLn appears | Removes limescale; restores temperature and flow |
Keep your Ninja coffee maker running like new between cleanings
A few steady routines will keep your brewer working like new and tasting great. Use filtered water when possible to slow scale and protect internal parts.
Don’t ignore CLn reminders; mineral buildup strains pumps and lines over time. Rinse removable parts after use and avoid leaving water in the reservoir for long stretches.
Handle parts gently. Don’t force hinges or latches, and keep moisture away from non-washable areas. Always unplug before wiping and never submerge the base.
Follow a simple cadence: daily rinse and wipe, weekly reservoir and filter checks, and periodic descaling based on indicators and usage. A well-kept Ninja coffee maker rewards you with steady flow and better cups every day.